Showing posts with label how to. Show all posts

Steak Done? An OK Handy Method

If you like your steak Well-Done (like me) or Rare (like many) the fool proof way to know "when it's done" is use a dependable instant read thermometer. After reading this you'll probably be frustrated until you get one. Here's some recommended beef "doneness" temperatures:

Blue rare 120°F
Rare 125 to 130°F
Medium-rare 130 to 135°F
Medium 135 to 145°F
Medium-well 145 to 150°F
Well-done 150 to 155°F
Really well done 160°F plus

Bookmark our: Temperature Guide

So... what if you forgot the handy meat thermometer? There's a handy barbecue tip that's been around a long time. "Hand"-y as in Hand. You can test your steak’s done-ness using the OK handy method. It's easy. Massage, stretch, and shake one hand loose so that your thumb and it's muscles are fully relaxed.

Touch the round base of your thumb on the relaxed hand. This soft resistance and feel is similar to the texture of a very rare thick steak.

Now - make the "OK" sign (don't pinch... just close your thumb and forefinger together) and again touch the base of your thumb. This texture is similar to a medium-rare steak.

Next, touch your thumb to your middle finger. This firmer resistance is similar to the texture of a medium steak.

Press your thumb to your fourth finger. The semi-firm texture at the base of your thumb is similar to a medium-well steak.

Finally, touch your thumb to your pinky. The very firm (some would say tough) texture at the base of your thumb is close to a well-done steak.

Burger Made Better Trick

I saw one of those Food Network stars making burgers last week and I saw one tip you have to try. The chef claimed that when you make your own hamburger patties of ground beef for grilling you could use his trick to keep the thick - disk shaped - patty from turning into a fat - ball shaped - patty.

The advice is to make your patty with an indentation in the center (see photo). That way when the center of the beef patty swells or plumps when you grill it, the burger will revert back to a normal / flatter patty shape that will nicely accommodate a soft bun. Simple enough.

We tried the technique in the BBQ test kitchen and must say were surprised at how well the "indentations" on the test patties disappeared. We probably could have made the dent evendeeper (or on both sides). The control patty ("test" or "not concave" is on the left in the photos) indeed DID expand in the middle... But honestly not enough to bother me.

Another recommendation would be to control yourself and keep from pressing the burger down on the grill with the spatula. I don't know why guys do this but I see it done all the time.

All-in-all the tip is worth while and is good general practice for the next time you're pressing patties.

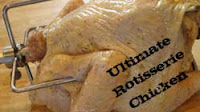
Roll With It: Tips For Rotisserie Chicken

CLICK FOR VIDEO
There's something about a rotisserie chicken.

They're everywhere these days in supermarkets - slow roasting by the dozen on display in industrial cookers the size of your guest bedroom. But the truth is if you have a rotisserie kit (it may have come with that fancy new grill and is now in a box in the attic somewhere) it's actually pretty easy.

Every attempt we made with our gas powered Sam's Club spit and electric motor set up ended with incredibly succulent and golden brown bird. There's only about four ingredients.

First start with a clean bird - Chicken and small Turkey seem to work equally as well. Rub lightly (watch for too much salt) with BBQ Tricks house seasoning UNDER the skin and over the entire outer surface of the skin. Rub seasoning generously inside the cavity of the bird (remove any "spare parts." Let the bird rest (upright if possible) uncovered in the refrigerator for about four hours to allow the seasoning to take and also to dry the skin a bit (this helps to crisp the skin later). My hunch is you could bypass all the above and still have an incredible meal but the little things do make a difference.

Remove the bird and let it come to room temperature about an hour before you plan to cook. two or three hours before you plan to serve.

Before you put the chicken or turkey on the spit mark the location of the grill's burner with two marks (with a Sharpie Permanent Marker) so you'll always know exactly where to slide the meat in the future.

The most important thing to accomplish is to balance and secure the bird firmly on the rotisserie prongs so that the entire mechanism rotates smoothly on the spit. Use trussing to help if needed. Test it by rolling the spit ends on a flat surface or even on your hands. After you have it on a hot grill it's very difficult to adjust. Also use pliers to secure thumb screws. You don't want an end to slide.


Finally make sure the spit is secure in the motor mechanism. Confirm there is no way for it to slide out (does it sound like it happened to me?)! After you start the spin and cook come back and sight check everything after five minutes. Let it Cook til golden brown checking infrequently for one to two hours. Our 4.72 lbs chicken took just over two hours.

When golden check the temperature with a good thermometer and remove to a cutting board to rest.

BBQ Tricks House Seasoning
2 Tablespoons Kosher Salt
1/2 Tablespoon Fresh Ground Black Pepper (grinding is a little bit more work but worth it)
1/2 Tablespoon Garlic Powder

Poultry's Recommended Internal Temperature: Is It Done yet?

Looking to safely cook chicken or turkey, without having it come out dry and flavorless? The USDA says to cook until the juices of the wings and thighs run clear. The only way to do it is use a thermometer (see below), and remember the wings and thighs reach a higher temperature faster than the breast. Here are some simple guidelines for safe internal temperatures that will keep your poultry tasting great! All measurements are Fahrenheit.

  • Ground Chicken or Turkey 165 degrees
  • Whole Chicken or Turkey 180 degrees (thighs, wings & legs) / 160 - 165 degrees (breast) Note: This should occur at about the same time.
  • Chicken or Turkey Breast 170 degrees
  • Duck 180 degrees
  • Grilled or Roasted Quail 145 degrees

In general, The USDA suggests poultry be cooked to an internal temperature of 165 before serving. This is lowered from a pre-2006 recommendation of 180 for turkey. Many of us have become too dependant on the "factory installed" thermometer that comes in frozen birds these days. These are likely to err on the side of "over cooked."


Click For Video

It is important to remember that internal temperature will indeed rise a bit while "resting" off the grill.

One universal tip is to watch for the juices to run clear but the best way to really know is by using an accurate instant read thermometer. You may already have an old dial faced version in your gadget drawer. In theory these are just fine and worked for many years; however I almost always find myself questioning the results. We prefer some of the really good digital instant read thermometer now available. In less than ten seconds you'll really know what temperature you have.

Cooks Illustrated spends a lot of time researching and testing the best of the best and when it comes to thermometers they suggest a model made by Thermapen for about $80 (based on pin-point accuracy and quick respnse time). But there are a few less expensive models.

NOTE: If the thermometer you're using needs to be "converted" from Fahrenheit to Celsius use this formula: Subtract 32 degrees from the (Fahrenheit) reading, then divide that number by 1.8. The result is the Celsius.

Basting Brush goes High Tech


Have you ever looked at an old wooden handle basting brush and thought, "That CAN'T be sanitary!"

The more you think about the porous wood... the residue in the fibers of the brush... the nooks and crannies that are almost impossible to clean... the more you think there has to be another way. There is; and too many cooks are still skeptical.

Even I never thought the new fangled silicone basting brushes would EVER work as well as my trusty paint brush - type basting brush. It wasn't the price... you can buy a bag of cheap paint brushes at Lowes for just a few bucks. In fact, I always thought the plastic / silicone basting brushes would just not grab enough sauce. That was before I tried it.

The designers of the BBQ tool (the brush shown is made by Rubbermaid) really thought it through. The individual brush "needles" are textured with hoops and bumps that "grab" onto everything from oil to BBQ sauce. Unlike the old style brush there's no deterioration, no loose brush hairs, and it's easy to clean. They feel great in your hand and are easy to manipulate. Best of all they're relatively cheap, especially considering may brands come with a lifetime guarantee. There are now lots of different manufacturers: see them here.

It's easy to stick with tradition in cooking, but a silicone brush for cooking this is a tool worth trying.

How To Use a Chimney Starter

One of the quickest ways to fix that funky fuel taste in backyard barbecue is to ditch the charcoal lighter fluid. Cooks are too often overzealous with the fuel (hey, we're guys) and it imparts a bit of an aftertaste if you're not careful. If you DO use lighter fluid make SURE it's all burned off well before cooking. Better yet... try a Charcoal Chimney Starter.

Chimney starters looks like a jet engine with a handle on the side. They cost about $20 and they're really easy, safe, and environmentally friendly way too start charcoal.

They do come in different sizes (large is about 7.5 inches in diameter). If you have a small grill stick with the smaller Charcoal starter. Remember with a chimney starter no lighter fluid needed...


Here's How to light it up:
  1. Find a clean, clear non flammable area to place the Chimney Starter. You could use the grill but you'll still need a non flammable place to set the RED hot chimney once you've filled the grill. A little caution goes a long way. Use gloves.

  2. Fill the larger compartment in the Chimney (the top) with regular or hardwood lump charcoal (recommended!). Match Light or instant lighting (fuel soaked) is not needed.

  3. Compress two large sheets of newspaper loosely into the bottom chamber. The whole key is getting air to everything so don't pack it in to much.
  4. Set the starter upright on the lower grate on your grill (remove the top one) and ignite the newspaper through the bottom holes using a lighter or match. That's it.

  5. After about 20 minutes your charcoal should be ready. Wait until the coals on top show some white ash.

  6. Carefully pour and arrange your coals on the grate. Yes Gloves... and be careful where you place that chimney it'll be blistering hot for about 30 minutes.

Perfect Measuring Trick

Creating the perfect sauce for barbecue often involves some sort of syrupy sweet ingredient that can make of break the secret flavor. I just saw Pat Neely of the world famous Neely's BBQ on TV and he had a great trick for measuring heavy syrups and thick liquids like honey or molasses (two common sauce staples).

The next time your measuring corn syrup, honey, or even maple syrup just give the measuring cup a good spray of PAM or a similar non stick oil spray. Not only will it keep your measurements consistent... there's less waste and it makes post sauce clean-up a bit less sticky!

How To: Skin Tomatoes


A lot of barbecue masters will use skinned tomatoes for different sauces. This is a great trick to get the thin skinned fruit peeled without testing how thin YOUR skin is!

Why peel it? Some say the skins add a bitter flavor to recipes.

Start with a very clean tomato without any stem:

  1. Get a large bowl of ice water handy. Half ice - half water. Save for later.

  2. "Score" or lightly cut a cross or X on the end of the tomato (this will help peeling later)

  3. Boil a pot of water. (Not the ice water... that's still set aside).

  4. Carefully submerge tomato in boiling water

  5. Use a slotted spoon o get it out once you can see the skin pulling off

  6. Drop it in the ice bath

  7. Let the tomato chill for about five and a half minutes

  8. NOW you're ready to peel. Use a small knife to get under and grasp the edge of the skin at the X you made. And yes, after all this... it can still be tricky to get it totally skinned!